• Skip to primary navigation
  • Skip to main content
CURIO SG

CURIO SG

Holistic Education

  • Home
  • Programmes
    • Secondary School Programmes
      • English Language ‘O’ Level Programme
      • English Literature ‘O’ Level Programme
    • Junior College Programmes
      • English Literature ‘A’ Level Programme
      • GCE ‘A’ Levels: General Paper
    • IP
      • IP Programme: English Language
      • IP Programme: English Literature
    • Crash Courses
      • O Levels English Language
  • Fees & Schedule 2025
  • Free Resources
  • About
  • Journal
  • Curio Assessment Books
  • Show Search
Hide Search
You are here: Home / Archives for creativity

creativity

Get Crafty! 12 Artisanal Workshops in Singapore Worth Trying

Nadya Sharfina · May 29, 2025 · Leave a Comment

“When stress builds up and life feels repetitive, slowing down to make something with your hands can be the most creative kind of therapy.”

Feeling a little stressed or stuck in the usual routine? Sometimes the best way to recharge is by picking up something with your hands and letting your mind wander creatively. Artisanal workshops are a hands-on way to explore new interests or dive deeper into hobbies you’ve always wanted to try. With so many options around Singapore, there’s plenty to discover.

This list of 12 artisanal workshops highlights experiences where you can learn a skill, craft something with your own hands, and enjoy the process along the way. Many of these sessions are open to adults, and some also welcome kids, so it can be a solo adventure or a fun activity to share. 

1. Taoz Ceramics Studio

Photo by Taoz Ceramics Studio

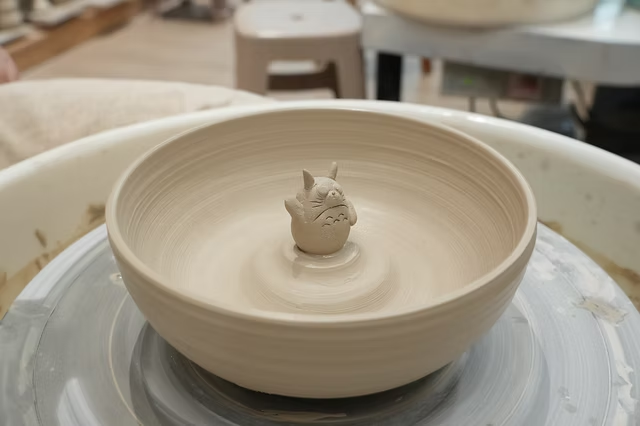
Tucked inside Orchard Gateway, Taoz Ceramics Studio is a lovely spot for families who want to try their hand at ceramics. With a range of pottery classes for all skill levels, everyone gets a chance to shape and paint something that’s truly their own.

The studio also has pottery painting sessions and trial lessons, so you can easily drop in and see what it’s all about. They even run team bonding activities, which are a great way for families or groups to connect through something creative. The space feels warm and welcoming, making it easy to settle in and enjoy the experience at your own pace.

2. Studio MU / YU

Photo by Studio MU / YU

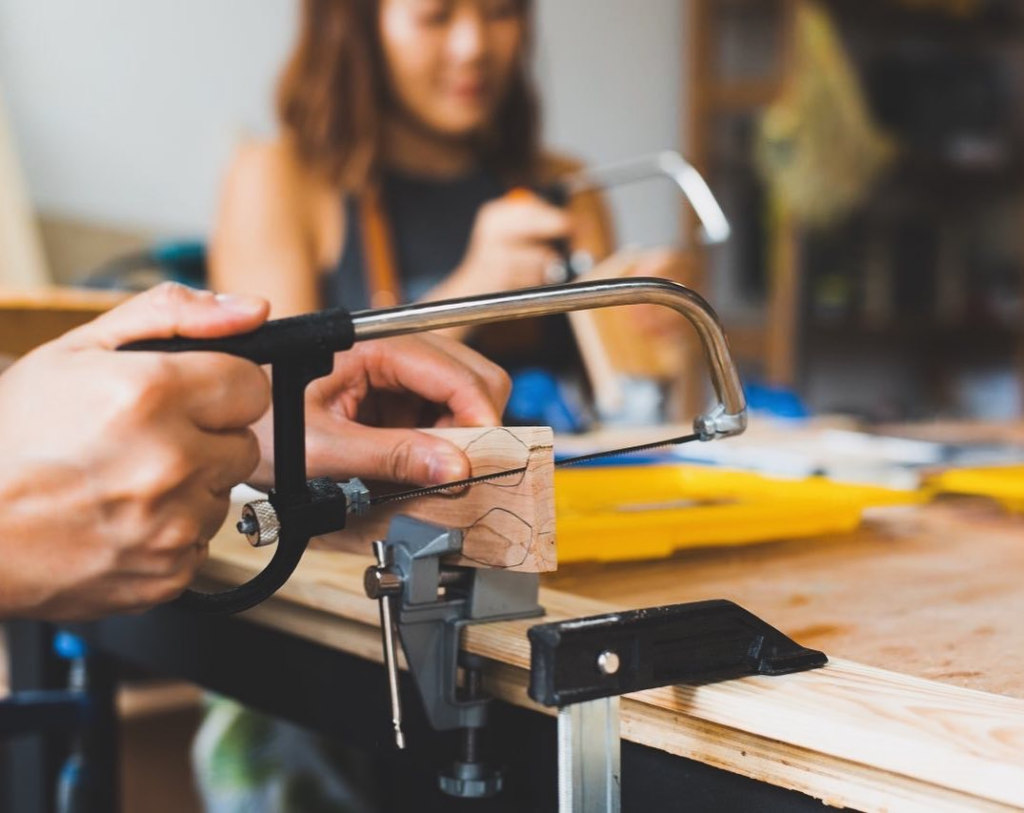
Studio MU / YU invites you into the calming and creative world of woodworking. In this three-hour workshop, you’ll get to work with traditional hand tools, learning through clear and engaging demonstrations that make the process approachable, even if it’s your first time.

During the session, you’ll design and cut your jewellery template, turning your ideas into something you can hold and take home. You’ll find the studio on Level 3 at 91B Lavender Street.

3. Crafune

Photo by Crafune

If you’ve ever wanted to make your own leather accessories like a bag, coin pouch, keychain, wallet, card sleeve, or cardholder, Crafune in New Bahru is a great place to start. Their leather accessories workshop teaches you the basics of leather crafting.

You’ll get to pick from a variety of leather colours and add a personal touch with hot stamping. The workshop encourages creativity and gives you the chance to design something you can use every day or share as a thoughtful gift. 

4. Perfumeplay

Photo by Perfumeplay

Located at 23 Bali Lane, Perfumeplay offers a delightful experience in the art of scent-making. The workshop introduces participants to the fascinating history of perfumery and the natural ingredients that create different fragrances. With a wide selection of essential oils and scents, everyone has the chance to explore and experiment, crafting a fragrance that feels personal.

Each participant gets their interactive workstation, complete with everything needed to blend a custom perfume or candle. It’s a lovely way to spend time being creative, and you’ll leave with a beautifully crafted keepsake or a thoughtful gift to pass along.

5. Anna Craft

Photo by Anna Craft

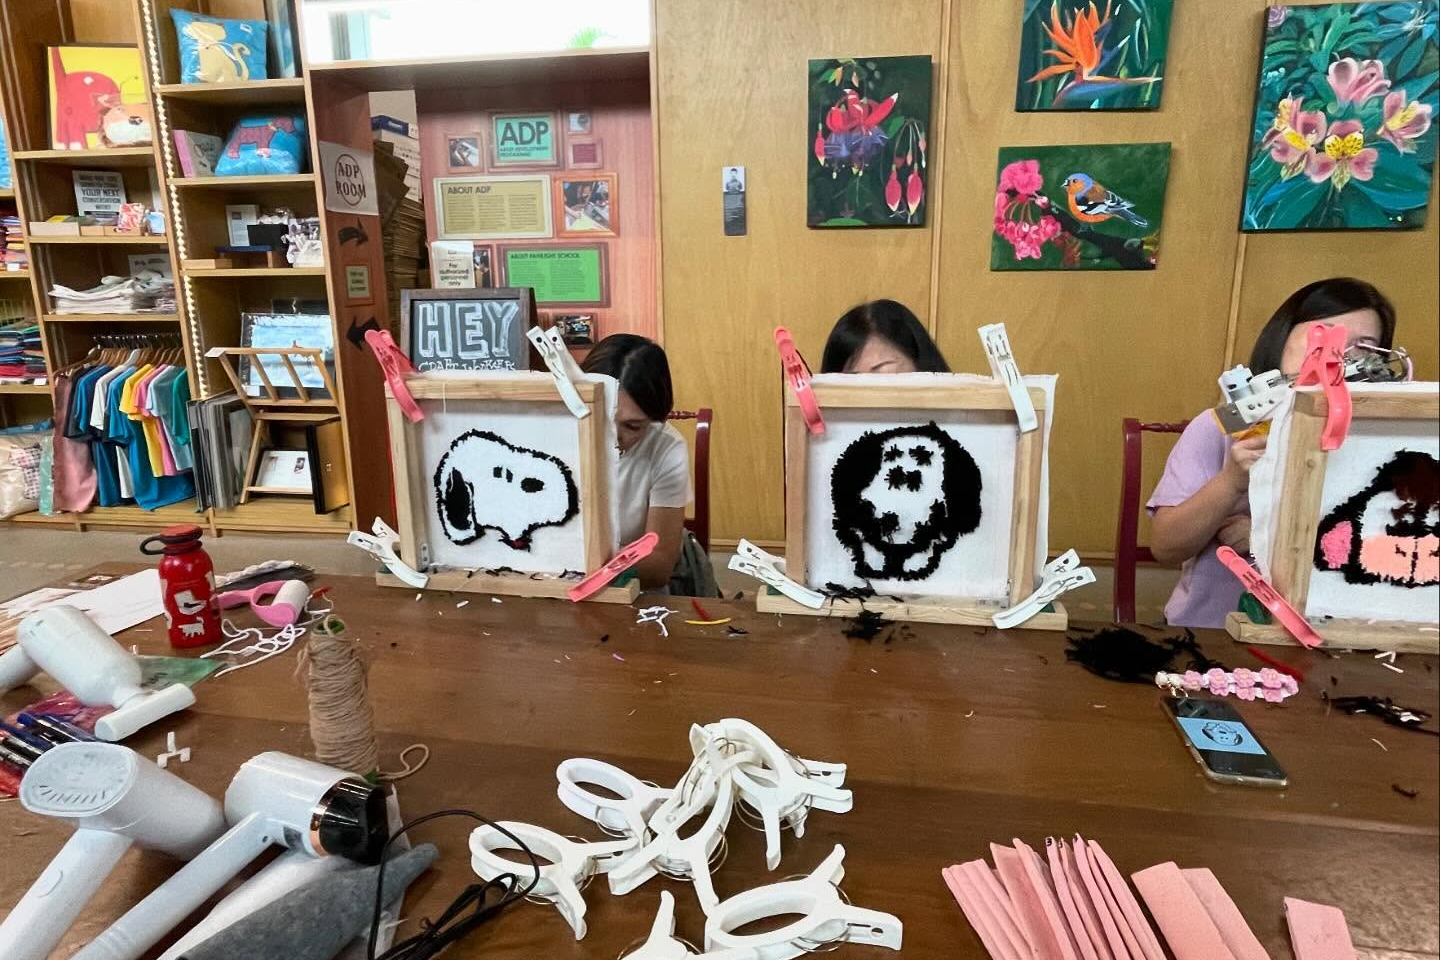
Anna Craft’s Tufting Workshop is a fantastic spot for anyone interested in creating unique textile pieces. You can customise your tufting projects into rugs, mirrors, pillows, or a variety of bags, letting your creativity run free with over 60 yarn colours to choose from.  

The studio at Pioneer Junction is cosy yet roomy, designed to comfortably fit up to 45 people. It’s a relaxed, welcoming place to spend a few hours getting creative. They’re open daily from 12:00 to 20:00, so it’s easy to find a time that works for you.

6. The Plant Story

Photo by The Plant Story

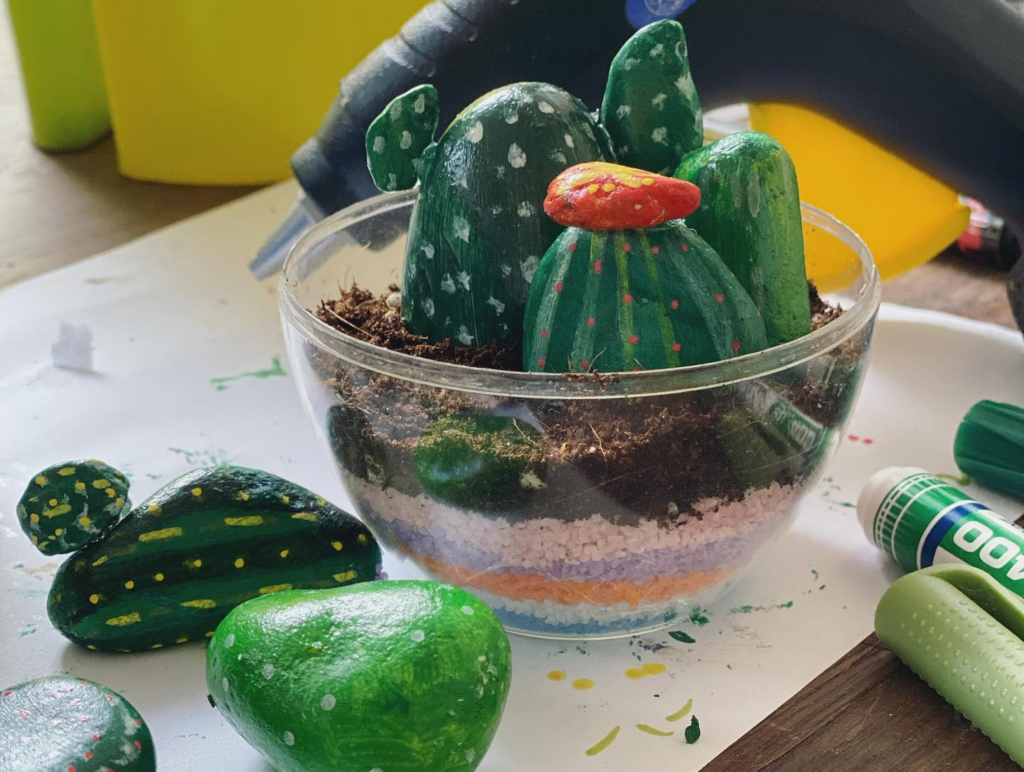
Tucked away in the peaceful surroundings of Seletar Aerospace Park, this nature-based workshop space invites you to slow down and reconnect with the natural world. Through Nature Therapy sessions, you’ll take part in activities that engage the body, mind, and soul. All in a private, green setting that feels far removed from the usual pace of city life.

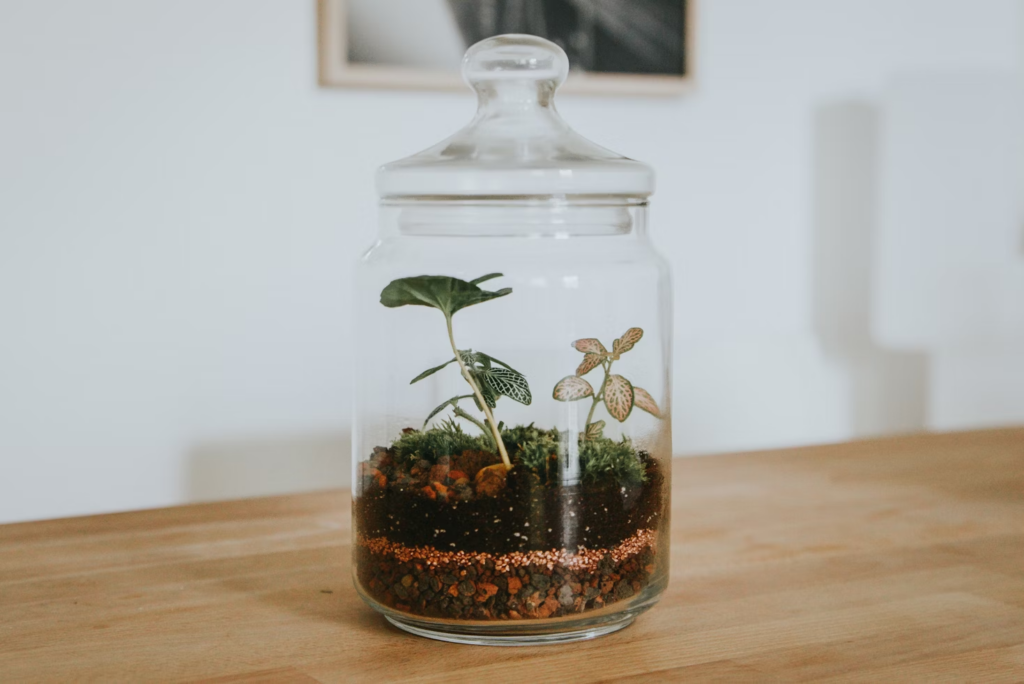
Participants can create their eco-sanctuary by building a miniature garden. There are several styles to choose from, including the Rainforest Garden (also known as a terrarium), Desert Garden, Air Garden, and Water Garden. 

7. Tombalek 

Photo by Tombalek

This spot is one of Singapore’s most unique and exciting creative spaces. Known as the Singapore Open Workshop, it’s where you can dive into hands-on crafts like woodworking, metalworking, and even glassblowing. If you’re curious about making a knife or designing a cheeseboard, there’s always something interesting to try here.

They also run furniture-making classes where you can build things like short stools, dining chairs, mini benches, or shoe benches. Tombalek workshop is located in the Monde Collection.

8. The Cozy Cabin

Photo by klook.com

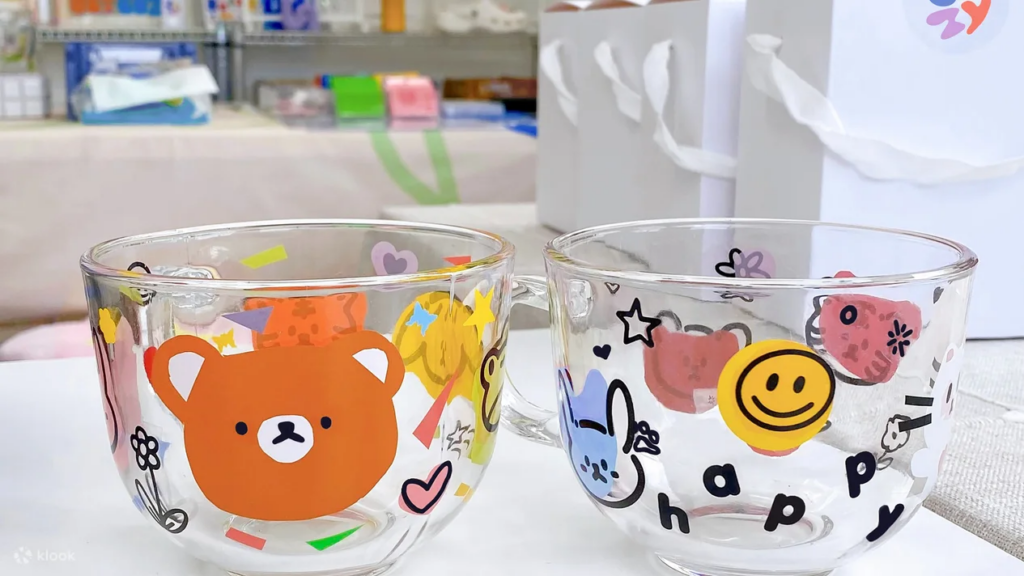
Get creative with glass decal art by decorating your own wine glass, cereal cup, or juice cup with playful and stylish designs. It’s a fun and relaxed way to explore colours, shapes, and patterns while making something uniquely yours.

Located at 35 Kallang Pudding Road, Tower A, #08-07 in the Tong Lee Building, this studio welcomes anyone aged 8 and up. Kids between 8 and 12 will need to be accompanied by a paying adult, making it a great chance for some creative family time.

9. Wildflower Studio

Photo by Wildflower Studio

Cat lovers, this one’s definitely worth checking out. Wildflower Studio brings together creativity and calm with their unique Art Jamming with Cats experience, set in the cosy Enabling Village. The studio works closely with rescue cats through a fostering program that focuses on rehabilitation and finding them new homes.

You can pick a 2.5-hour semi-guided session or a 1-hour unguided one, depending on how you want to spend your time. You might spend the time painting at your own pace or simply chilling with the cats. It’s a relaxed way to enjoy some quality time with furry friends in a space that values kindness and respect between humans and animals.

10. The Sundowner

Photo by The Sundowner

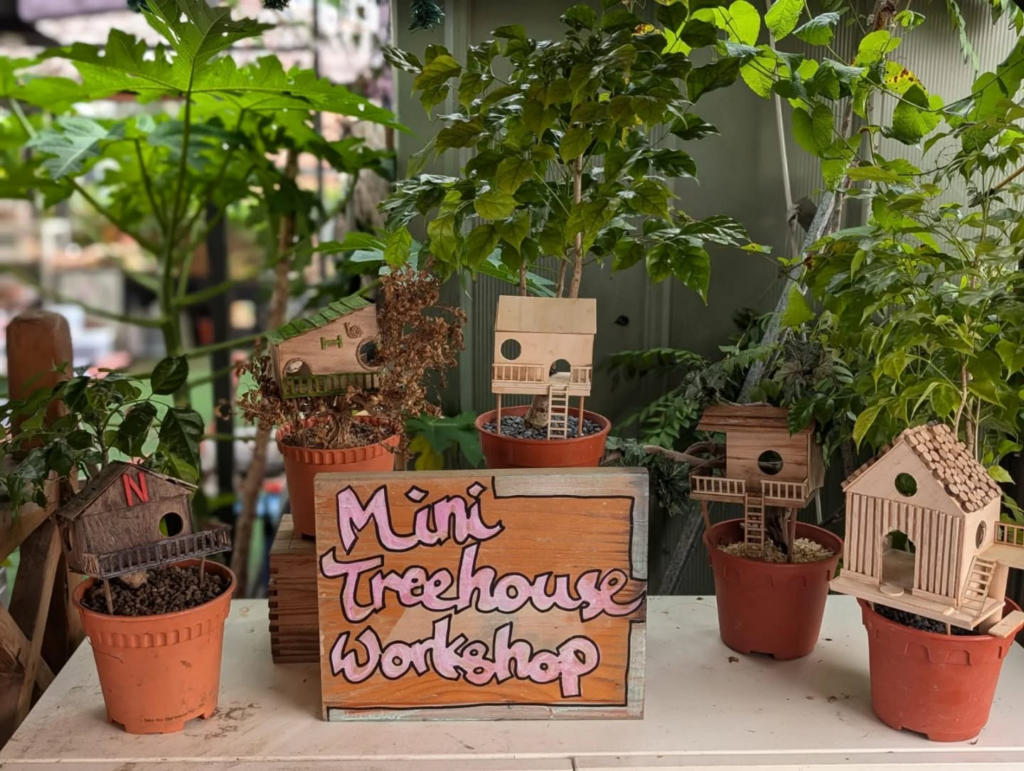
Now, let’s step into nature. Nestled near Siglap Centre at Pay2Home MTM – 7-Eleven East Coast Road, The Sundowner is a nature experience centre packed with fun activities for families. You’ll get up close with bees, ants, and earthworms during their Farm Encounters.

There’s plenty to get creative with, too, like paper marbling, terrarium building, beeswax candle making, and crafting a Mini Zen Garden or Mini Treehouse. Feeling hungry? You can brew your own coffee, mix a cocktail, or get hands-on with a handmade pasta lunch or pizza dinner, all using fresh herbs grown right on-site. With so much to explore, The Sundowner is a refreshing mix of nature, food, and craft.

11. Yixing Xuan Teahouse

Photo by  Yixing Xuan Teahouse

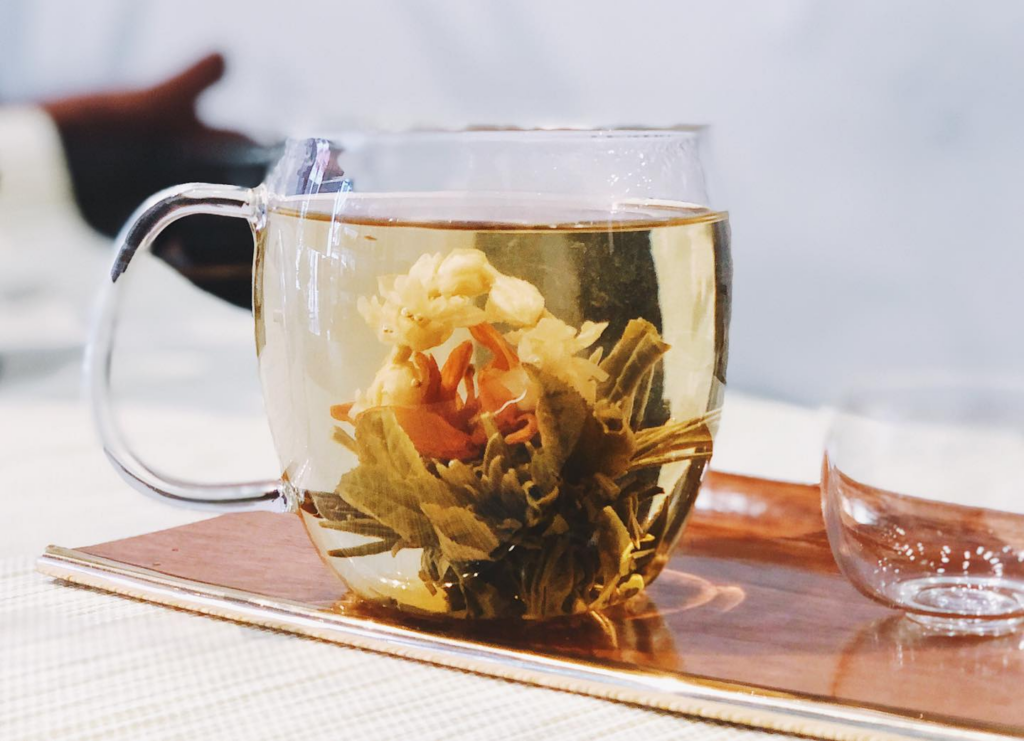
Located at 78 Tanjong Pagar Road, Yixing Xuan Teahouse welcomes you to experience the calming tradition of Chinese tea making. In this one-hour workshop, you’ll dive into the rich heritage of tea culture. Learning to identify different types like White, Green, Flower, and Oolong teas, discovering classic brewing techniques, and hearing stories that link tea to Chinese art, health, and everyday life.

The session is designed for small groups, with a minimum of 2 and a maximum of 25 participants. If you’re unable to visit in person, they also have a virtual workshop option, where all the materials are delivered right to your doorstep.

12. Soap Ministry

Photo by Soap Ministry

At Soap Ministry, crafting your own skincare products is both fun and informative. The workshops focus on natural, eco-friendly ingredients like plant-based oils, ideal for anyone curious about what goes into their soap or bath bomb. Classes include Melt & Pour Soap-Making, bath bomb creation, and skincare basics, and they’re suitable for all ages.

Everything you create smells great and is gentle on the skin. Over time, using organic soap with nourishing ingredients can really improve how your skin feels. You’ll find Soap Ministry at 277 Orchard Road, Gateway, #03-04 Orchard.

Here’s the full list of 20 artisanal workshops that invite you to tap into your creative side. Regardless of age or experience, there’s always something new to explore. These sessions are a great way to slow down, try something different, and walk away with something you’ve made yourself. So go ahead, sign up for a class, bring your family and friends, and enjoy the process of creating together.

Check out more in our article on creative activities with kids: 5 Exciting DIY Projects for Children to Create at Home.

5 Exciting DIY Projects for Children to Create at Home

Nadya Sharfina · March 12, 2024 · Leave a Comment

"Build bonds and memories through creative DIY projects with your child, fostering communication and skills that last a lifetime."

Engaging in DIY projects with your child is an excellent opportunity to strengthen your bond and encourage open communication enjoyably and creatively. Through various DIY projects, such as science experiments, artistic pursuits, or hands-on crafting projects, your child can acquire valuable knowledge and develop practical skills. Transforming your home into a hub of DIY creativity offers a fulfilling way to make your stay-at-home moments enjoyable and memorable for the entire family.

Bookcase

Photo by Lesly Juarez on Unsplash

If your child is a bookworm, a bookcase can be a valuable addition to your home. Not only does it provide a dedicated space for their growing collection, but it also encourages them to read more. For instance, as they finish one book, you can reward them with another, fostering a continuous love for reading. While DIY projects like building a bookcase may demand time and effort, they offer an opportunity for you and your child to bond. Engaging in such projects allows your child to become familiar with household tools, learn about construction, and develop practical skills that can be applied in various aspects of life.

Materials Needed:

  • Wood boards (such as pine or plywood) for shelves and sides
  • Wood screws
  • Wood glue
  • Wood stain or paint (optional)
  • Sandpaper
  • Drill
  • Saw (circular saw or hand saw)
  • Measuring tape
  • Level

Instructions:

Step 1: Measure and cut the wood boards according to your desired bookcase dimensions. You’ll need pieces for the sides, shelves, and back panel.

Step 2: Attach the sides to the shelves using wood glue and screws to create the frame of the bookcase. Make sure everything is square and level.

Step 3: Attach the back panel to the frame using screws and wood glue. This adds stability to the bookcase.

Step 4: Sand the entire bookcase to smooth out any rough edges or surfaces. Apply wood stain or paint according to your preference. Let it dry completely.

Step 5: Use a stud finder to locate wall studs. Secure the bookcase to the wall using screws and wall anchors if necessary, especially for taller bookcases.

Step 6: Once the bookcase is securely installed, arrange your books and other items on the shelves as desired.

Terrarium

Photo by Maud Bocquillod on Unsplash

Embarking on the journey of building a terrarium with your child offers a delightful blend of creativity and education. As you construct the terrarium, you and your child can delve into the world of biology, learning about the plants you’re nurturing. Once the project is complete, it’s important to remind your child about the maintenance required to keep the plants thriving. This hands-on experience not only beautifies your living space but also provides ongoing opportunities for learning and connection with nature.

Materials Needed:

  • Glass container or jar with a wide opening
  • Gravel or small rocks
  • Activated charcoal (optional)
  • Potting soil suitable for terrariums
  • Small plants (succulents, ferns, mosses, air plants)
  • Decorative elements (small figurines, rocks, driftwood)
  • Spray bottle filled with water
  • Gloves (optional)

Instructions:

Step 1: Get a glass container that’s wide enough for easy planting. You can pick clear or coloured glass, and decide if you want it open or closed.

Step 2: Put some small rocks at the bottom for drainage. This keeps water from pooling and causing root rot. You can also add a bit of charcoal on top to keep things fresh.

Step 3: Add potting soil on top of the rocks, about 1-2 inches deep.

Step 4: Take your plants out of their pots, loosen up the roots, and plant them in the soil. Arrange them so they look nice and have space to grow.

Step 5: Spruce up your terrarium with little decorations like figurines or rocks. Just don’t go overboard and crowd the plants.

Step 6: Use a spray bottle to water the soil and plants lightly. Don’t drown them, and only water when the soil feels dry.

Step 7: Put your terrarium where it gets indirect sunlight or bright, filtered light. Avoid direct sunlight, which can fry your plants.

Step 8: Keep an eye on your terrarium for too much water, bugs, or extra growth. Trim any dead leaves and tidy up the soil. With good care, your terrarium will be a lovely addition to your home.

Birdhouse

Photo by Lubomirkin on Unsplash

Constructing a bird feeder or birdhouse can be a delightful project for your child, offering a charming way to entice birds into your balcony or yard while simultaneously providing them with sustenance and shelter. Encouraging your child to participate in building the feeder or house fosters their creativity and nurtures a sense of responsibility towards wildlife. As they observe the birds frequenting their creation, they can learn about different bird species and their behaviours, fostering a deeper connection to the natural world around them.

Materials Needed:

  • Wood boards
  • Wood screws
  • Wood glue
  • Drill
  • Saw
  • Sandpaper
  • Paint or wood stain (optional)

Instructions:

Step 1: Decide on the type and size of birdhouse you want to build. You can find many free plans and designs online.

Step 2: Cut the wood boards according to the dimensions of your chosen design.

Step 3: Assemble the birdhouse using wood glue and screws. Make sure to leave an entrance hole for the birds.

Step 4: Drill drainage holes in the bottom of the birdhouse to allow water to escape and prevent the nesting area from becoming waterlogged.

Step 5: Sand the birdhouse to smooth out any rough edges. You can also paint or stain it to add colour and weather protection.

Step 6: Place the birdhouse in a suitable location, preferably mounted on a pole or hanging from a tree branch.

Step 7: Once installed, keep an eye on your birdhouse and enjoy watching the birds that come to nest in it.

Tissue Box

Photo by amazon.com

A handmade tissue box adds a touch of personalised charm to your home decor, showcasing your child’s artistic skills in a unique way. It can be placed in the living room, kitchen, bedrooms, or any other desired location. Your children can explore different artistic techniques and themes, allowing their creativity to shine through in every brushstroke or design choice. Remember to prioritise cleanliness as you incorporate this decorative piece into your home. 

Materials Needed:

  • Cardboard tissue box
  • Fabric of your choice (cotton, linen, or any fabric you like)
  • Scissors
  • Fabric glue or sewing machine
  • Decorative elements (buttons, ribbons, etc.)

Instructions:

Step 1: Lay your fabric flat and place the tissue box on top. Leave enough fabric around the box to cover it completely, with a little extra for seam allowances. Measure and cut the fabric according to the dimensions of the tissue box, adding about 1 inch (2.5 cm) to each side for seam allowances.

Step 2: Fold the fabric in half with the right sides facing inwards. If your fabric has a pattern, make sure it’s facing the inside of the fold. Sew or glue the side seams together, leaving the top and bottom open. If sewing, use a straight stitch and backstitch at the beginning and end to secure the seams.

Step 3: Test the cover on the tissue box to ensure it fits nicely. Adjust the seams if necessary.

Step 4: Hem the raw edges at the top and bottom of the cover by folding them over about 1/4 inch (0.6 cm) and sewing or glueing them down. This will give the cover a clean, finished look.

Step 5: Get creative and personalise your tissue box cover by adding decorative elements like buttons, ribbons, or appliques. Glue or sew these embellishments onto the cover as desired.

Step 6: Once your cover is complete, slide the tissue box inside and adjust the fabric as needed to ensure it sits neatly inside the cover.

Step 7: Display your cute tissue box cover in any room of your home where tissues are needed. 

Custom Tote Bag

Photo by paper-and-glue.com

A custom tote bag DIY project is a practical endeavour for your child, offering them a versatile accessory they can carry anywhere, whether it’s to school, to the grocery store, or just hanging out with friends. It allows your child to embrace their inner artistic side, particularly if they aspire to be a designer. By customising their tote bag, they can express their creativity while also having a functional item that reflects their personality and style. 

Materials Needed:

  • Canvas tote bag
  • Fabric paints or markers
  • Paintbrushes
  • Stencils (optional)
  • Palette or paper plates for mixing paint
  • Fabric medium (if using regular acrylic paint)
  • Iron (for setting fabric paint)

Instructions:

Step 1: Lay out your canvas tote bag on a flat surface. Make sure to protect your work surface with newspaper or a drop cloth to prevent any paint spills or stains.

Step 2: Plan out your design before painting. Think about what inspires you—whether it’s art, quotes, or patterns—and lightly sketch your ideas with a pencil.

Step 3: Use fabric paints or markers to fill in your design. You can paint freely with brushes or use stencils for more precise patterns. If you’re using acrylic paint, mix it with fabric medium as per the instructions.

Step 4: Play with colours and textures to make your design pop. Painter’s tape can help create clean lines and shapes. Try different techniques to get the look you want.

Step 5: Let your tote bag dry completely to prevent smudging. This ensures the paint sticks well to the fabric.

Step 6: If you’re using fabric paint that requires heat setting, follow the instructions on the paint label. Typically, this involves ironing the painted area on the reverse side of the fabric to set the colours and make them washable.

Step 7: Once dry and set, add any final touches like your name or decorative elements such as buttons or patches. Your custom art tote bag is now ready to use!

These five recommended DIY projects offer fantastic opportunities for quality family time. Whether you engage in DIY activities with your children after their school day or during weekend downtime, they are sure to infuse an element of fun into your family’s time at home. Consider extending your DIY adventures into the kitchen with your kids, teaching them basic cooking skills that will prove invaluable as they grow older. Read Smart Food Choices for Kids’ During Exams. While some DIY projects may require time and patience, they are ultimately rewarding activities that strengthen bonds and create lasting memories for the entire family.

CURIO SG

Copyright © 2025 Curio Singapore · Log in

  • Home
  • Journal
  • Frequently Asked Questions
  • Contact
  • Careers
  • Free Resources